Gary Anderson explains McLaren's Canada car changes
McLaren brought a couple of developments and modifications for its 2025 Formula 1 car for the Canadian Grand Prix.
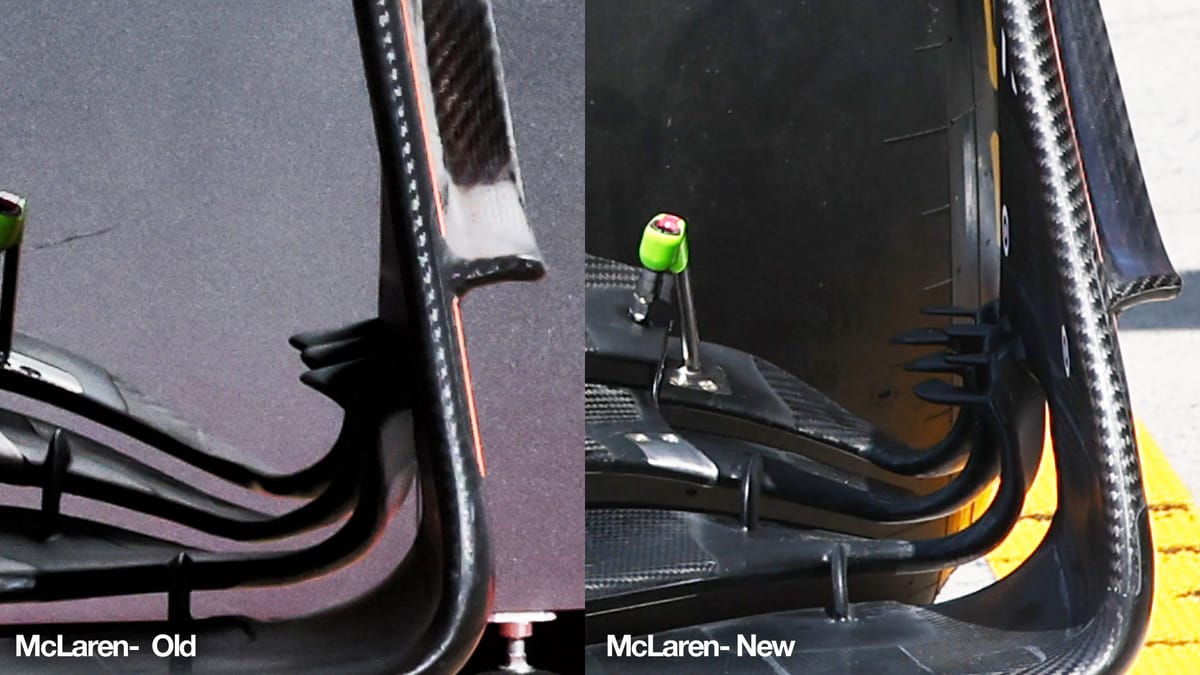
One was an outer endplate detail. This modification was tested on Friday but McLaren is not intending to race it yet.
It will be to work in conjunction with the stiffer front wing regulations introduced for Barcelona a fortnight ago. If the wing doesn’t flex as much then the gap underneath to the ground will be larger. This detail on the inner side of the front wing endplate will then need to be more powerful if you are going to get the same out-wash performance as previously.
If you don’t have as much out-wash then you will have more in-wash, which increases the turbulent airflow to the important aero surfaces inboard.
Initially Oscar Piastri ran a substantial aero rake just behind the front wheel. The aero rake frame is highlighted with the green arrows, the actual pitot tubes with the blue arrows. You can see the angle they are set at relative to the front wing endplate. This is because they are trying to measure the outwash flow going around the outside of the front tyre.
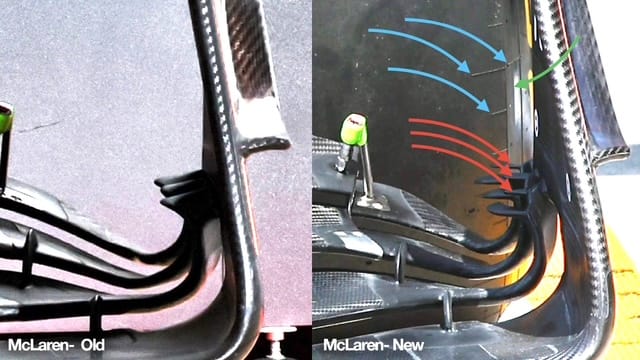
Adding these three additional vanes - which I have highlighted with the red arrows - should strengthen the flow detail that is set up with this curl design at the lower wing to endplate intersection.
The second item which is a bit more difficult to see is a small geometry change to the front suspension to reduce the ‘numbness’ that the drivers are feeling under braking and turn in.
With this amount of anti-dive the car is supported mechanically through its wishbone pick-up point system and not so much by the stiffness of the actual suspension spring stiffness. With this, the driver doesn’t feel the car movement relative to their braking input.
McLaren will decide before FP3 if it continues with this but from what I saw of the car on a very slippery Montreal track during Friday’s practice sessions it didn’t look like it has made a lot of difference.
In the image below I have highlighted the top front wishbone forward leg with the blue line, the rearward leg with a red line. It might just be an optical illusion but it looks like the rear leg now has a slight bend in it. This might point to the fact that the changes are to the outer end detail where the upper wishbone bone picks up on the upright assembly. This leg is in tension under braking so shouldn’t be a problem. However, as I said earlier it is very difficult to see any major differences.
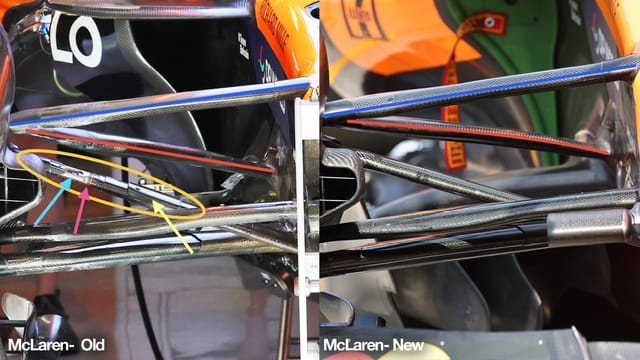
The other thing I have highlighted with the yellow ellipse is the ride height adjustment on the pullrod. Take out one small fastening and slide the carbon cover highlighted with the light yellow arrow down the pullrod and you can then loosen the nut highlighted with the light blue arrow and change the shim highlighted with the magenta arrow. Tighten it all up again, refit the cover and job done.
It's all working in the tension of the ‘pullrod system’ so there’s no buckling effect by it being halfway down the pullrod.